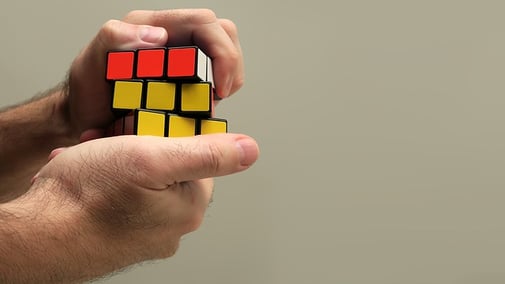
The Rubik's cube—a 3x3x3 cube of mixed colored blocks—has been perplexing users since it was created in the 1970s. Solving it is difficult enough, but "speedcubers," or those who solve the cube at breakneck speeds, have renewed interest in how to solve a Rubik's cube for people around the world.
If you want to be a world record-breaking speedcuber, you have to start small. This guide on how to solve a Rubik's cube for beginners gives an overview of the basic method, an introduction to Rubik's cube algorithms, and even some advanced tactics for those of you looking for some tips to boost your speed.
A Brief History of the Rubik's Cube
The Rubik's cube was invented by Ernő Rubik, a Hungarian sculptor and architecture professor. Rubik hoped to create something that would help him understand how a structure consisting of multiple pieces could have those pieces moved without destroying the mechanism. It wasn't until he scrambled the pieces and had to fix it that he discovered its potential use as a 3-D puzzle.
The first cubes, a test design, were released into Budapest toy shops in 1977 before being purchased by American toy company Ideal Toys. Ideal rebranded the cube as the Rubik's cube to honor the creator in 1980, and the toy became hugely popular in the following decade.
Eventually, the Rubik's cube fell out of popularity in the United States and many other western countries; however, it remained popular in China and what was then the USSR because the trend had picked up later in Communist countries around the world. The popularity of the cubes in Communist countries, especially ones as populous as China, ultimately kept the toys in production.
The Rubik's cube once again became popular in the 21st century, due in part to the formation of the World Cube Association in 2003. Speedcubing had always been popular among Rubik's cube enthusiasts, but the formation of this organization helped push fans to become ever faster in their solving techniques.
Currently, China's Yusheng Du holds the world record for solving a single cube in just 3.47 seconds. But there are other records, too:
- Jack Cai from Australia holds the record for solving a single cube blindfolded in 16.22 seconds
- Feliks Zemdegs from Australia has the single-cube, one-handed record at 6.88 seconds
- Daniel Rose-Levine from the US has the single-cube world record for solving with just his feet, at 16.96 seconds
How to Solve a Rubik's Cube: Important Vocab to Know
When it comes to how to solve a Rubik's cube, it might look like following a series of simple steps. In reality, though, it's quite complex.
Before you even start trying to follow the numerous strategies for solving, get familiar with the vocabulary. This will make it easier to follow the confusing Rubik's cube algorithms and permutations you must use to solve it!
 Ruwix.com
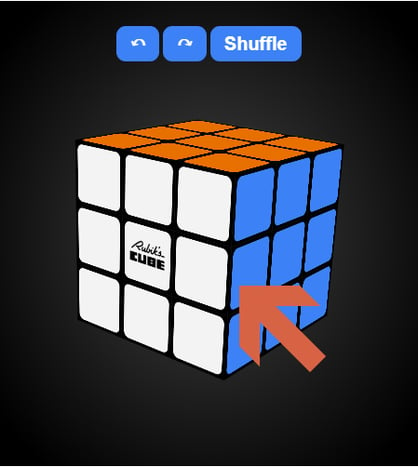
Edge
An edge piece on a Rubik's cube is the part where two visible colors meet. There are 12 edges in total.
 Ruwix.com
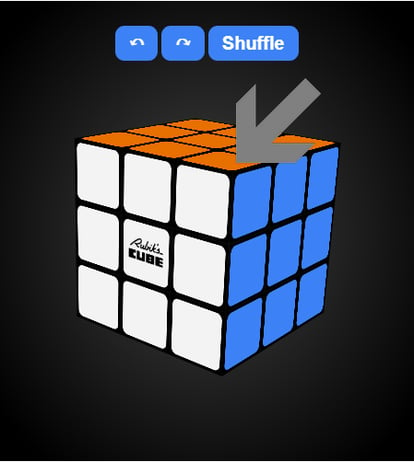
Corner
As expected, a corner piece is located in the corner of each side of the cube. They have three visible colors, and there are eight corners in total.
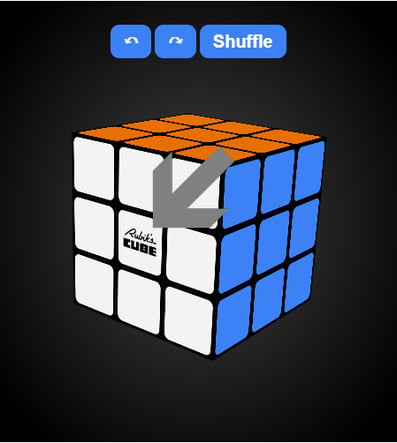 Ruwix.com
Center
Center cubes are located in the center of each side and have one visible color. There are six in total, and, unlike the rest of the cubes, they do not move position. Because they are fixed, the color of the center cube is used to represent each side of the Rubik's cube.
Layer
The part of a cube you turn, consisting of nine blocks. No matter which way you hold the cube, there are three layers.
Faces
Like all cubes, the Rubik's cube has six sides, or faces. When executing Rubik's cube algorithms with the beginner's method, it's assumed you're looking at the cube with the white face up, meaning the Rubik's cube logo should be on top.
With this in mind, Rubik's cube notation works as follows:
| Face | Notation |
| Left Face | L |
| Right Face | R |
| Up Face | U |
| Down Face (bottom of cube) | D |
| Front Face (facing you) | F |
| Back Face (facing away from you) | B |
| Middle Face (center "slice") | M |
| Entire Cube | Y |
Regular/Inverted Turn
There are two ways to turn a layer: regular and inverted. A regular turn is a clockwise turn, and an inverted turn is a counterclockwise turn.
In Rubik's cube notation, an inverted turn is represented with a lowercase i, such as Ri. This would mean that you rotate the right side counterclockwise.
Algorithm
A Rubik's cube algorithm is an operation, or a series of rotations, that reorients the blocks into a desired outcome. They are usually written with a capital letter denoting the face that should be rotated, a lowercase i if that rotation should be counterclockwise, and a number 2 if it should be rotated twice.
Permutation
Permutation refers to the act of moving the blocks into the desired formation, or the arrangement of the pieces.

How to Solve a Rubik's Cube: 7-Step Guide
The beginner's method for solving a Rubik's cube is still fairly difficult, so take lots of breaks and don't be afraid to use a solving tool if you're really struggling with a certain section. The more you practice, the better you'll get. Don't give up!
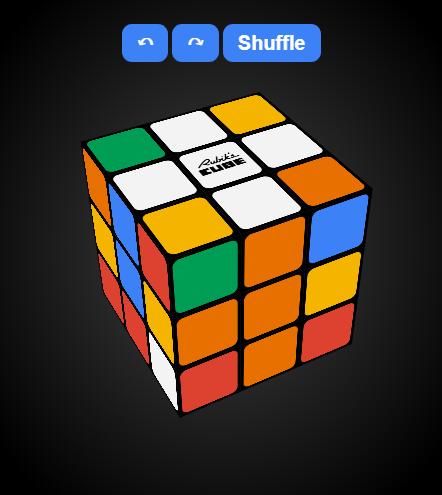 Note the two cubes of the same color beneath each arm of the white cross. (Ruwix.com)
Step 1: Create White Cross
Begin by holding the cube with the white face up. You probably won't start with the white face finished, so remember that a face's color is determined by the center cube. That means that the face with the white center cube should be facing up.
The first step to the beginner's method is to create a cross on the white face. There's no strict algorithm to perform here, as there are so many potential permutations of the cube. Instead, focus on creating the white cross using intuitive movements.
When you've created the white cross, there should be two blocks of the same color aligned on each face directly below the white block on the top face. If that isn't the case, keep working with the cube until those pieces are properly aligned, or the next step will be much more difficult.
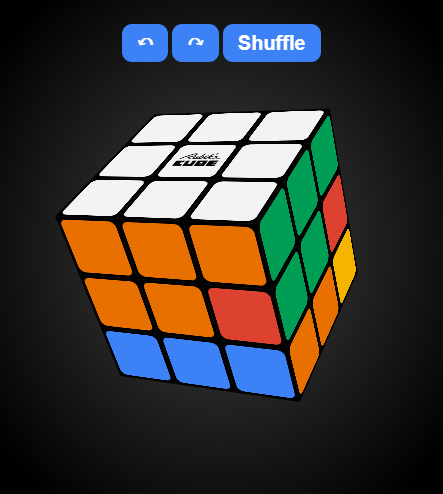 Note the top layer's three cubes being the same color as the center cube. (Ruwix.com)
Step 2: Solve White Corners
Now that the white cross is in place, it's time to finish this face by solving the white corners. Use the white cross foundation to organize your side color. By the time you finish this step, you should have three cubes of the same color in the top layer and one cube in the center of the middle layer of the left, right, back, and front faces.
To solve this step, you'll need to run through some algorithms, or rotation patterns that result in a specific cube placement.
Rotate the bottom layer until a white edge piece is positioned below an empty spot on the top face. Find the direction of the white piece you want to align below and then run through the algorithm until the white cube is in place. If you're not quite ready for memorizing Rubik's cube algorithms, run through the simple algorithm below instead.
If you find that your center pieces have migrated, you'll need to get your white cross set up again. If you run through these algorithms properly, the center pieces should end up back where they began.
Simple Algorithm
| Algorithm | Explanation |
| Ri Di R D | - Rotate the right face counterclockwise.
- Rotate the down face counterclockwise.
- Rotate the right face clockwise.
- Rotate the down face clockwise.
|
If your white cube faces down after you've run through this algorithm, run through it three more times. If your white cube faces left after running through the algorithm, repeat it five times.
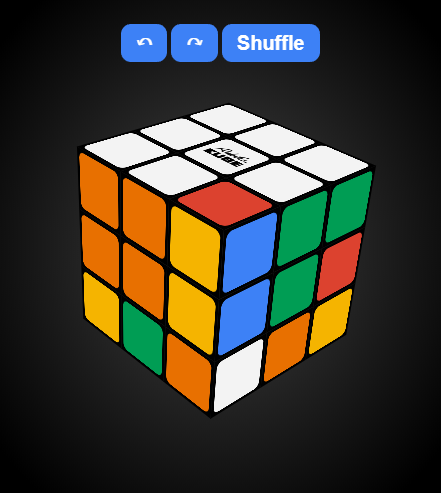 A white sticker facing right. (Ruwix.com)
If Your White Sticker Faces Right
| Algorithm | Explanation |
| Ri Di R | - Rotate the right face counterclockwise.
- Rotate the down face counterclockwise.
- Rotate the right face clockwise.
|
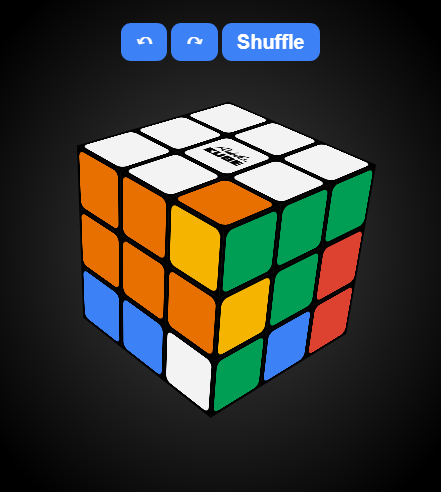 A white sticker facing left. (Ruwix.com)
If Your White Sticker Faces Left
| Algorithm | Explanation |
| F D Fi | - Rotate the front face clockwise.
- Rotate the down face clockwise.
- Rotate the front face counterclockwise.
|
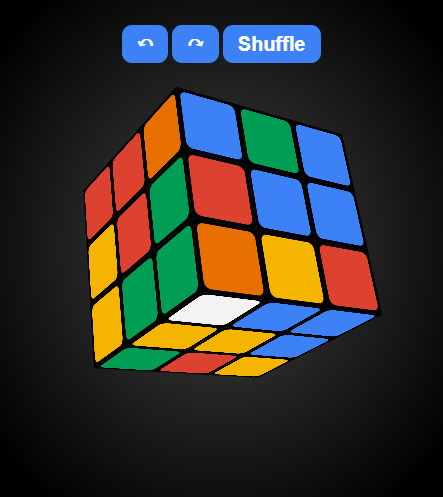 A white sticker on the bottom. (Ruwix.com)
If Your White Cube Is on the Bottom
| Algorithm | Explanation |
| Ri D2 R D Ri Di R | - Rotate the right face counterclockwise.
- Rotate the down face clockwise two times.
- Rotate the right face clockwise.
- Rotate the down face clockwise.
- Rotate the right face counterclockwise.
- Rotate the down face counterclockwise.
- Rotate the right face clockwise.
|
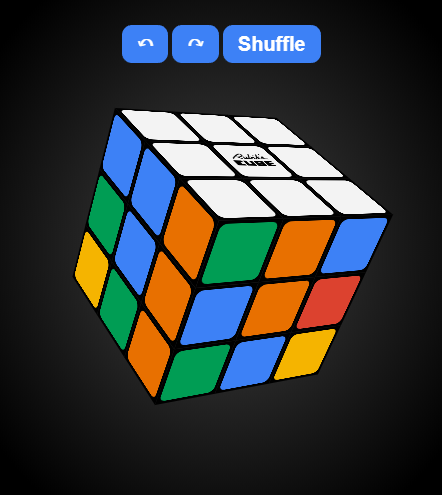
Edge pieces mismatched. (Ruwix.com)
If the White Sticker Is on Top, but the Top Layer Isn't All the Same Colors
| Algorithm | Explanation |
| L D Li Ri Di R | - Rotate the left face clockwise.
- Rotate the down face clockwise.
- Rotate the left face counterclockwise.
- Rotate the right face counterclockwise.
- Rotate the down face counterclockwise.
- Rotate the right face clockwise.
|
Whatever position the white cube is in now, repeat with the appropriate algorithm from above until the colors match up. There should be three of the same color on the top layer and one in the center of the second layer.
Step 3: Solve Middle Layer
At this point, the white face should be completed, and each other face, except the face opposite the white face, should have three blocks of the same color in the top layer and one block also of that color in the center of the face.
Using the location of the top layer middle piece, we will now rotate the cubes until we get the bottom two layers to all be the same color.
To begin solving the middle layer, rotate your cube until the completed white face is on the bottom. Don't worry about messing it up because you're not looking at it—as long as you follow the algorithms, everything will go back into position.
The goal of this stage is to get the colored edge pieces into their correct place on each face. There are three algorithms you can use to accomplish this. Find which one suits your needs and you should have this section solved in no time.
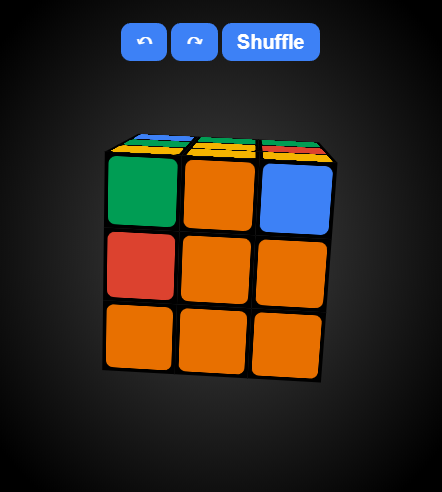 Top layer, center cube needs to go to second layer left. (Ruwix.com)
If You Need the Center Top Piece to Go to the Second Layer Left
| Algorithm | Explanation |
| Ui Li U L U F Ui Fi | - Rotate the up face counterclockwise.
- Rotate the left face counterclockwise.
- Rotate the up face clockwise.
- Rotate the left face clockwise.
- Rotate the up face clockwise.
- Rotate the front face clockwise.
- Rotate the up face counterclockwise.
- Rotate the front face counterclockwise.
|
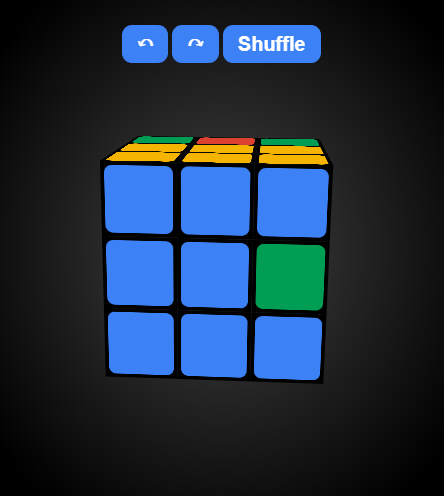 Top layer, center cube needs to go to second layer right. (Ruwix.com)
If You Need the Center Top Piece to Go to the Second Layer Right
| Algorithm | Explanation |
| U R Ui Ri Ui Fi U F | - Rotate the up face clockwise.
- Rotate the right face clockwise.
- Rotate the up face counterclockwise.
- Rotate the right face counterclockwise.
- Rotate the up face counterclockwise.
- Rotate the front face counterclockwise.
- Rotate the up face clockwise.
- Rotate the front face clockwise.
|
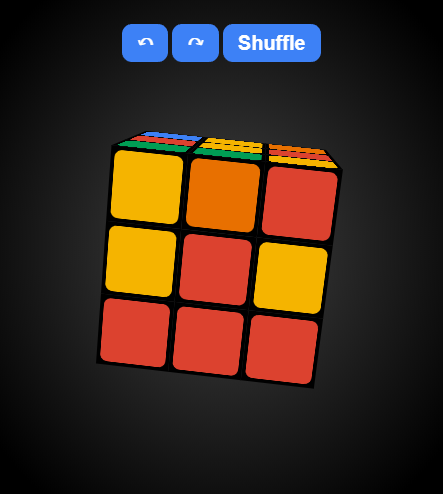 Top layer cube is not in the proper position. (Ruwix.com)
If an Edge Piece Is Not in the Top Layer or It's Oriented Wrong
| Algorithm | Explanation |
| U R Ui Ri Ui Fi U F U2 U R Ui Ri Ui Fi U F | - Rotate the up face clockwise.
- Rotate the right face clockwise.
- Rotate the up face counterclockwise.
- Rotate the right face counterclockwise.
- Rotate the up face counterclockwise.
- Rotate the front face counterclockwise.
- Rotate the up face clockwise.
- Rotate the front face clockwise.
- Rotate the up face clockwise two times.
- Rotate the up face clockwise.
- Rotate the right face clockwise.
- Rotate the up face counterclockwise.
- Rotate the right face counterclockwise.
- Rotate the up face counterclockwise.
- Rotate the front face counterclockwise.
- Rotate the up face clockwise.
- Rotate the front face clockwise.
|
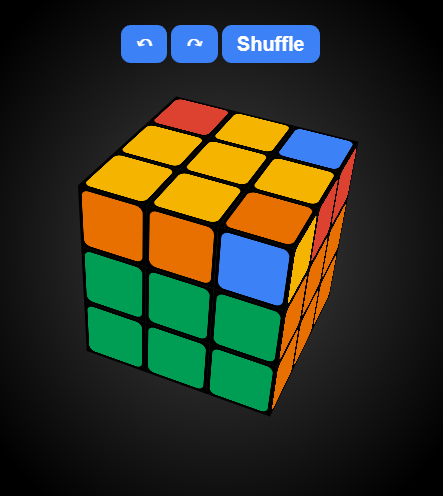 Yellow cross. (Ruwix.com)
Step 4: Create Yellow Cross
This step is just like the white cross, but there are a lot more pieces to think about since you've already solved a great deal of the puzzle. At this stage, don't worry if the edge pieces don't match the face color. We'll work on that later.
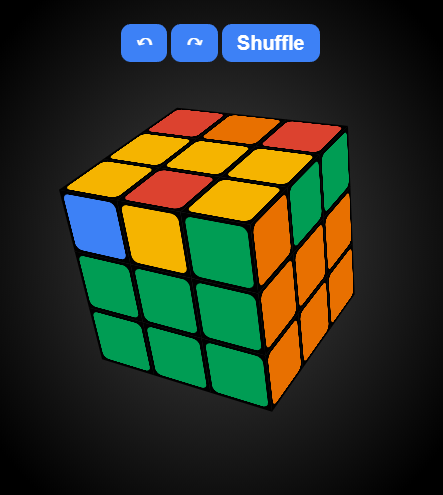
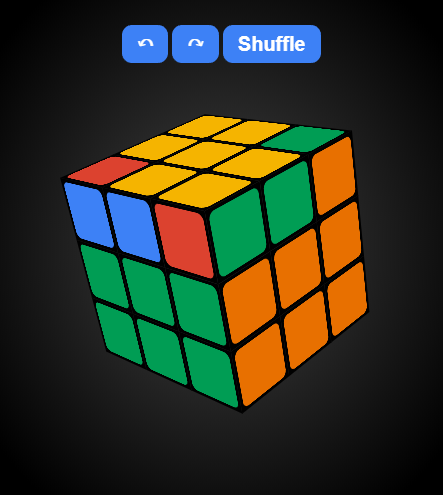
There are three different patterns you might see on your cube. Look at the top face and consider only the shape of the yellow cross—ignore the edge pieces for now. You might see one single yellow dot in the center, you might see an L shape, or you might see a line.
Once you figure out your correct arrangement, run through the following algorithm as many times as specified below.
| Algorithm | Explanation |
| F R U Ri Ui Fi | - Rotate the front face clockwise.
- Rotate the right face clockwise.
- Rotate the up face clockwise.
- Rotate the right face counterclockwise.
- Rotate the up face counterclockwise.
- Rotate the front face counterclockwise.
|
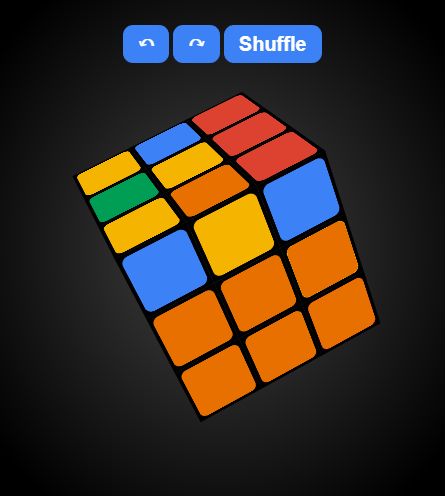 Yellow center dot. (Ruwix.com)
If You Have A Single Yellow Dot
Execute the algorithm three times.
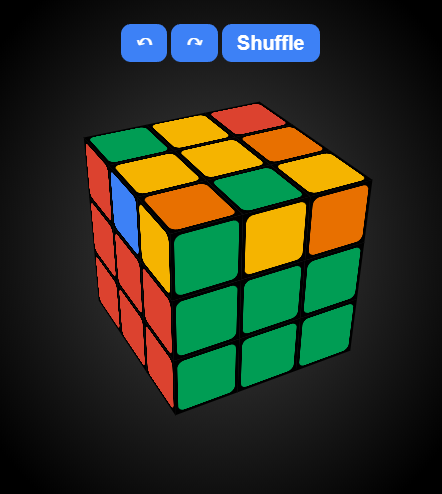 Yellow "L" shape. Note the orientation, with the legs encasing the top left edge. (Ruwix.com)
If You Have an L Shape
Rotate your entire cube until the legs of the L shape encase the edge piece in the top left. Execute algorithm two times.
 Yellow line formation. (Ruwix.com)
If You Have a Line
Rotate your entire cube until the line is horizontal. Execute the algorithm once.
 The yellow cross has been completed, but the edge pieces aren't in the right position. (Ruwix.com)
Step 5: Swap Yellow Edges in Top Layer
Now it's time to make sure the yellow cross is oriented correctly so that the color of the center cube of the top layer matches the face it's on. We'll be using an algorithm that will switch the front-top and left-top edges.
Rotate your top layer until you find two edges that need to be swapped with each other. If you can't find two edges from different faces located on the next face over, you can run through the algorithm twice.
| Algorithm | Explanation |
| R U Ri U R U2 Ri U | - Rotate the right face clockwise.
- Rotate the up face clockwise.
- Rotate the right face counterclockwise.
- Rotate the up face clockwise.
- Rotate the right face clockwise.
- Rotate the up face clockwise two times.
- Rotate the right face counterclockwise.
- Rotate the up face clockwise.
|
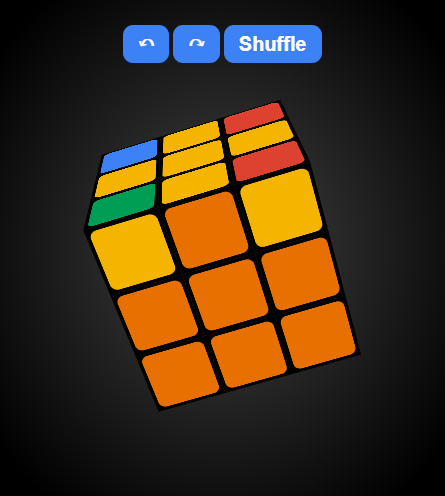 Yellow corners need to be positioned properly so they can go into their correct spots. (Ruwix.com)
Step 6: Position Yellow Corners
Let's get those remaining yellow corners where they belong. Right now, they just need to go into the correct spots—it doesn't matter if the orientation is wrong.
First, look for a yellow corner that is in the right position, even if it isn't yet on the top face. Rotate the entire cube in your hands until the correctly positioned yellow cube is in the front-right-top position. Then, cycle through the algorithm below until the other three corners are in the correct position.
If you can't find a yellow cube in the right spot, keep repeating the algorithm on a random corner until you get it in the correct spot.
| Algorithm | Explanation |
| U R Ui Li U Ri Ui L | - Rotate the up face clockwise.
- Rotate the right face clockwise.
- Rotate the up face counterclockwise.
- Rotate the left face counterclockwise.
- Rotate the up face clockwise.
- Rotate the up right face counterclockwise.
- Rotate the up face counterclockwise.
- Rotate the left face clockwise.
|
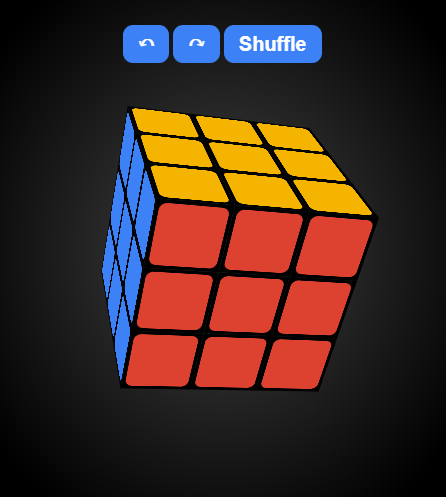 A finished cube. (Ruwix.com)
Step 7: Solve Final Layer Corners
We're in the home stretch! Now that our yellow cubes are positioned, we need to properly orient the corners.
Hold your cube with the upper piece you want to orient in the front-right-top corner. Run through the below algorithm until that piece is in its correct position. Once that one is properly oriented, repeat the process until the next piece is in position, and so on, until the cube is solved.
Don't panic if it starts to look as though you've messed the whole cube up. It will go back to normal once you've finished getting all the yellow corners into place. Don't skip any turns, even if it looks like you're done, as this can mess things up!
You can rotate the top layer between complete repetitions of the algorithm to put cubes in place.
| Algorithm | Explanation |
| Ri Di R D | - Rotate the right face counterclockwise.
- Rotate the down face counterclockwise.
- Rotate the right face clockwise.
- Rotate the down face clockwise.
|

How to Solve a Rubik's Cube: 3 Alternative Solutions
The beginner's method to solve a Rubik's cube is just that: for beginners. If you want to get into speedcubing, you'll need to master some of the trickier, but more efficient, methods.
#1: Fridrich Method
The Fridrich Method, also called CFOP, is one of the most prominent in speedcubing. It's both fast and efficient, eliminating many of the repetitive algorithms in favor of accuracy and saving moves, but it's also definitely not easy. It's recommended that you master the beginner method before moving on to the Fridrich method so you have a core understanding of how the cube works.
The Fridrich Method works by dividing the cube into layers, which are solved individually using algorithms, rather than solving each face. It consists of four steps, outlined below, each with its own set of rules and algorithms.
Step 1: Cross
In this step, you'll be forming a cross. Most speedcubers start with the white cross for consistency's sake, but you can use any color you like. We'll refer to this as the white cross.
For speedcubing, start with the white face down. You can solve the cube with the white face in any direction, but practicing with it down will help improve your speed.
Because there are so many possible cube arrangements, this step is done by intuition. Practice a lot to get a deep understanding of how to rotate pieces to form a cross quickly.
Form the white cross so that the sides of each white edge match the color of the lateral center pieces. Turn your edge pieces so that they are in the correct position, and move on to the next step.
The cross stage takes an average of seven rotations for speedcubers. The fewer rotations, the less time lost in this step.
Step 2: First Two Layers (F2L)
The second step, in which the first two layers are solved, is also typically done intuitively, although algorithms do exist. The layers are solved simultaneously, meaning you should not solve each side individually.
There are 41 possibilities for what your cube could look like at this point. You'll need to solve the four corners of the first layer and the four middle-layer edge pieces. To do this, combine matching corner and edge pieces into blocks. Next, solve those blocks to their proper position and repeat until the first two levels are solved.
Step 3: Orient Last Layer (OLL)
Now that the first two layers are done, we need to do the top layer. Our goal in this step is to get the last layer oriented correctly—we don't need to worry if the side colors don't match until the next step. We'll get the upper face all one color, which will be yellow if we have our white face on the bottom.
There are two possible approaches to this stage: the two-look OLL and the one-look OLL.
Two-Look OLL
The first step of the two-look OLL, which is the easier but slower method, is to orient the last layer edge pieces. To do this, there are three algorithms. You might recognize these from the beginner-method stage in which you create the white cross.
The second step is to orient the last layer's corner pieces. This one has seven different algorithms depending on the configuration of your top face.
One-Look OLL
In this version, you'll use one algorithm to solve all variations and orient the last layer. You have to learn many algorithms in order to execute this stage properly, but it saves two to four seconds if you're speedcubing. These algorithms are organized by the shape they make on the upper face, so practice this stage until each algorithm feels natural when you see the corresponding cube arrangement.
Step 4: Permutation of Last Layer (PLL)
There are 21 potential arrangements of your cube at this stage, which means that you have 21 different algorithms to learn. Once again, there are two different methods: two-look and one-look PLL.
Two-Look PLL
In this version, you'll solve the cube within two algorithms, which means you have to learn fewer algorithms overall. However, if you want to solve cubes at world-record speeds, you'll want to know all of them. This version is great for beginners, but those who want to be competitive will need to work on mastering one-look PLL.
First, you'll need to permute the corner pieces on the top face using one of two algorithms: the Aa-perm and the E-perm.
Next, permute the edges. Once you've correctly permuted the corners, there are only four variations and therefore four algorithms: Ua-perm, Ub-Perm, Z-perm, and H-perm.
Follow the appropriate algorithm and you'll have solved the cube!
One-Look PLL
One-look PLL will have you solve the Rubik's cube with only one algorithm. This requires a lot of memorization but can save you valuable seconds if you're competing.
Practice these algorithms a lot so they become second nature to you.
#2: Roux Method
The Roux Method, like the Fridrich Method, is for those experienced with solving Rubik's cubes. If you want to reduce your time from the beginner's method, learning the Roux Method can be a great way to accomplish that.
There are four main steps in the Roux Method.
Step 1: Build a 1x2x3 Block on One Side
Start with the L-side if you're right-handed. By the end of this step, the edges of the back, down, and front faces, as well as the corners of the down, back, and left faces and the left and right centers, will be solved.
How you approach this step will depend on the configuration of your cube. With so many potential solutions, you'll need to solve this section intuitively rather than by executing algorithms.
Step 2: Build a 1x2x3 Block on the Opposite Side
Don't worry about being optimal here, since there are still so many possible combinations. The creator of this method suggests focusing first on solving a 1x2x2 block by putting together a corner-edge pair and then adding in the missing edge before solving for the last corner and edge. This lets you focus on just two elements rather than all of them at once.
Algorithms depend on your unique configuration, so practice matching the configuration with the correct algorithm until it comes naturally to you.
Step 3: Solve the Remaining 4 Corners
This stage is one of the most difficult in the Roux Method. It's recommended that you learn the cases little by little, building on each one as you practice more.
There are 48 potential ways your cube could be arranged here. How you solve the cube will depend on the arrangement, so work through this collection of algorithms with lots of different variations to get the hang of them all.
Step 4: Solve Remaining 6 Edges and 4 Centers
With so much of the cube finished, on average, most people need fewer than 15 moves to solve the cube from here.
The first step of this stage is to orient the edges. You do this only by moving the middle and up faces, saving valuable movement since the other faces are already oriented correctly.
Next, you'll solve the right and left edges of the up face, which should complete the left and right side layers as well.
Finally, solve the center and edges of the middle face. There are only three possible cases for this stage, which eliminates some of the necessary memorization, though there is potential for optimization.
#3: ZZ Method
The ZZ Method, created in 2006 by Zebigniew Zborowski, is a newer method of solving the Rubik's cube that's divided into three stages.
Step 1: EOLine
In this step, your goal is to orient all the cube's edges (EO) while getting the DF and DB edges in line (Line). If solved in this way, you can finish the cube by rotating only the L, R, and U faces rather than all of them.
This stage takes an average of six moves to solve but shouldn't take more than nine; however, it's the most difficult of the steps because it requires a lot of forethought.
Step 2: First Two Layers (F2L)
In this step, you'll be solving the first two layers. To accomplish this, build two 1x2x3 blocks on either side of the line you made in the EOLine stage. Again, now that the edges are oriented, you only need to rotate the L, R, and U faces to complete the cube.
Step 3: Last Layer (LL)
As you might have guessed, the final step is to solve the last layer. Like some other Rubik's cube solving methods, you can solve the cube with a two-look system (two algorithms) or a one-look system (one algorithm). The two-look system has 20 potential algorithms to be learned, while the one-look system has a whopping 493 potential algorithms.
How to Solve a Rubik's Cube for Beginners: 3 Key Tips
Learning to solve the Rubik's cube is no small feat! Even the beginner's method can be tricky to execute well, so here are some quick tips to help you master the cube.
#1: Practice, Practice, Practice
Solving a Rubik's cube is hard. There's no simple method—the beginner's method is still a long and detailed process that requires learning new vocabulary and following steps that might be unfamiliar to you.
The only way to get better is to practice, so keep working at it until you can feel your speed increasing as you go. Don't give up if you feel like you're not getting anywhere—each repetition brings you closer to memorization!
#2: Use a Cube Solver If Necessary
Sometimes it can feel as though you get impossibly stuck, but a Rubik's cube solver can be the answer. If you can follow the steps of a solver to see how to get yourself out of a pickle, you'll be better prepared next time you run into a similar situation. Don't be afraid to let someone show you how to do it!
#3: Start Simple
Even if you want to get into speedcubing, start simple: master the beginner's method before you move on to others, as you'll need that solid foundation to understand how the cube works and how to move your fingers more efficiently.
Once you've done that, you can move on to advanced methods and learn all the little finger tricks that make speedcubing possible.
What's Next?
Looking to impress your friends with some new tricks? Learn how to make slime!
In search of quirky and fun extracurricular activities, like solving a Rubik's cube? Learn more about what extracurriculars are and why you need them.
Unsure how to turn your passion for speedcubing into something you can write about on your college applications? Read more about how to write about extracurriculars here!


 Ruwix.com
  Ruwix.com
  Ruwix.com
 Note the two cubes of the same color beneath each arm of the white cross. (Ruwix.com)
  Note the top layer's three cubes being the same color as the center cube. (Ruwix.com)
  A white sticker facing right. (Ruwix.com)
  A white sticker facing left. (Ruwix.com)
  A white sticker on the bottom. (Ruwix.com)
 Top layer, center cube needs to go to second layer left. (Ruwix.com)
  Top layer, center cube needs to go to second layer right. (Ruwix.com)
  Top layer cube is not in the proper position. (Ruwix.com)
  Yellow cross. (Ruwix.com)
  Yellow center dot. (Ruwix.com)
  Yellow "L" shape. Note the orientation, with the legs encasing the top left edge. (Ruwix.com)
  Yellow line formation. (Ruwix.com)
  The yellow cross has been completed, but the edge pieces aren't in the right position. (Ruwix.com)
  Yellow corners need to be positioned properly so they can go into their correct spots. (Ruwix.com)
  A finished cube. (Ruwix.com)


0 Response to "Easy and Cool Tricks With a Rubiks Cube"
Post a Comment